DIY: Painted Hockey Love Signs

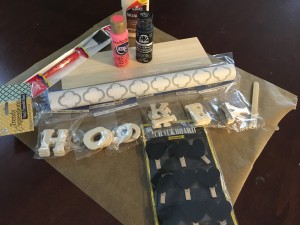
Hockey Love Signs – Materials
If you’re looking for a fun craft to beat the winter blues, this Painted Hockey Love Sign is a good place to start. It would make a thoughtful, inexpensive gift for a friend, loved one or colleague as well. Lets get started, shall we?
You’ll Need:
1 Bottle Black Acrylic Paint
1 Bottle Color of Your Choosing Acrylic Paint
1 Paint Brush
1 Bottle Wood Glue, I used Elmers
1 Popsicle Stick
1 Piece of Sign Wood in Desired Size
Wooden Sign Letters for Desired Word — I used “Hockey”
1 Package Vinyl Transfer Sheet in Desired Pattern
1 Package Mini Clothespins (Found in the Wood Section at Craft Store)
1 Package Wooden Hearts – I used these pre-made ones that were hanging on the clearance end cap at A.C. Moore, but if you can’t find pre-made ones, a package of mini clothespins and a package of wooden hearts (stars, etc) will work, its just an added step
1 Piece of Parchment Paper
Twine
Scissors
1 Water Container to Clean Brush
A Handful of Paper Towels to Pat Dry Brush
A Few Pieces of Masking Tape and/or Hockey Tape
Directions:
- On a surface, such as the kitchen table where you can spread out, place a generous piece of parchment paper down.
- Unroll your vinyl transfer sheet, lay your wooden sign piece down over a clear chunk of the pattern and trace the piece of wood onto to paper backing. Cut out your traced rectangle and set your transfer sheet aside, we’ll use this later.
- Taking your wooden sign piece, evenly coat the front and sides with desired color and set aside on your parchment paper, it will dry fairly quickly.
- Wash your brush. While your wooden sign piece is drying, take your black paint and begin to paint your letters, distributing paint evenly on the front and sides. Once completely coated, double check that you didn’t miss a spot – then set aside on the parchment paper to dry. If you have hearts or stars that need painting, now is the time to paint those as well.
- Once your wooden sign piece is dry to the touch, take your pre-cut vinyl transfer sheet rectangle and per the instructions on the package, gently peel off the paper backing and place on the painted side of your wooden sign piece – make sure its straight before you press down.
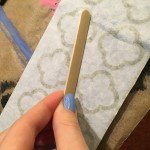
Step 6
- Smooth your hand over the vinyl transfer, working out any bubbles you might have. Next, take your handy dandy popsicle stick, starting at one side of your wooden sign piece, begin rubbing it fairly hard to make sure your vinyl adheres to the wood properly. I went over mine two to three times to ensure it was adhered, if it’s not, the vinyl wont stick to the wood correctly and it will begin to peel up when you start to pull off the backing.
- Once you’re content that you’ve given the “smoothing process” your all, starting at one corner of the wood, begin to peel the backing SLOWLY off the wood. If you find a piece of the vinyl did not adhere properly, lay the paper back down in that spot and go over it more vigorously with the popsicle stick so it sticks.
- Take your letters, which are dry to the touch, and decide how you’d like them to lay on your now patterned wood piece. Once you’ve decided on a format, I went straight across in the the middle of the wood, take your popsicle stick, and wood glue and begin to place a thin layer of glue on the back of the letter and place the letters, giving them a secure little pressing motion onto the wood.
- If you bought pre-made heart clips, you can just adhere them to the wood wherever you’d like to place them using the above method. If you did not buy them pre-made, take your painted heart, or star shape and glue them to your mini clothespin, then glue the clothespin to the patterned board. Set aside to dry.
- Cut a piece of twine the desired length. Once your glue on the front has dried, flip the sign over and attach the twine to the back of the sign. I had every intension of using a hot glue gun to do this, but forgot to buy glue sticks – crafters worst nightmare. If you have a hot glue gun, by all means assemble it that way. If you don’t, using 4 small pieces of masking tape, you can attach the twine to the back. I added a few pieces of hockey tape over the masking tape to give it a nicer completed look and feel.
- Clip a few of your favorite photos into the mini clothespins and hang your sign!
My favorite part of this project is that it’s extremely versatile, by changing the colors of the paint, the word, etc. It can go from a hockey themed DIY to a child’s or pet’s name, or a favorite word, the opportunities are endless. Changing out the heart and using a star, a football, an animal, a dog bone is easy — everyday the craft store is adding a new small wooden shape to the mix.
From start to finish, this project took an hour or less, had minimum difficulty and a beautiful end product!