Recipe: Mint Pucks, a Homemade Take on Thin Mints
If you had the opportunity to list the seven deadly sins in your life, what would they be? For me, Girl Scout cookies top the list, but not just any flavor, Thin Mints in particular. Of course supporting the Girl Scouts and buying cookies is a good thing, my little sister is one and I would never dream of rejecting her pleas to purchase a box. But anyone who has a mild addiction to the Thin Mints perfect snap, smell and taste knows that the season to purchase them is limited and stocking up with multiple boxes isn’t always viable (or smart). Through research, trial, error and we’re talking LOTS of error (that one batch that could actually be used as hockey pucks, looking at you!). Finally, the recipe is just right and adaptable if for some crazy reason you don’t like the mint flavor, you can use regular chocolate for a delicious alternate.
Ingredients
1 cup (2 sticks) salted butter, at room temperature – needs to be slightly soft
1 cup unsweetened cocoa powder
1 cup powdered sugar
1 teaspoon vanilla
1 1/2 cups flour
Coating
1/2 – 3/4 bag mint flavored baking chocolate (We purchase at our local craft store, such as AC Moore in the baking aisle)
or
1/2 – 3/4 bag semi-sweet baking chocolate and 1 teaspoon peppermint extract
*We’ve used both versions of the coating and it’s been delicious either way. We’ve also used just the semi-sweet chocolate as a coating for those that aren’t fans of mint!
Directions
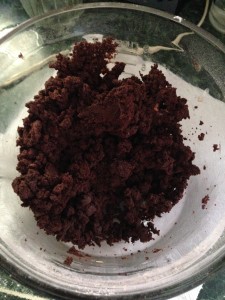
1. Mix all ingredients in large bowl until you reach a dough consistency.
2. Chill dough in bowl for 15-20 minutes in the fridge or 10 minutes in the freezer.
3. While dough in chilling, line 2 cookie sheets with parchment paper.
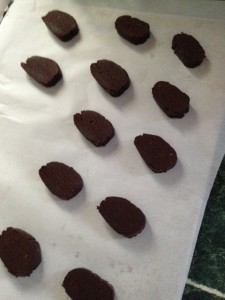
4. Using your chilled dough, begin pulling pieces forming 1 inch balls — here’s where you need to get creative, using the bottom of a glass or the palm of your hand, smoosh the dough ball until it’s a flat “puck” skating in around 1/2 inch thick, place on a lined cookie sheet.
5. Bake the pucks for 10-12 minutes at 375 degrees. Oven temperatures vary, so keep a close eye on them, one minute they’re perfect, the next they’re burned to a crisp. You’re looking for a crisp cookie, remember they’ll bake a bit more once you take them out. Keep the cookie sheets lined with parchment paper, it’ll allow for easier cleanup at the end.
6. While allowing the cookies to cool, melt your chocolate, the mint chips or the plain chocolate and peppermint extract, or just plain baking chocolate in a glass bowl in the microwave, stopping to stir every 15-20 seconds.
7. Drop a “puck” cookie individually into the melted chocolate, using a fork, pick it up so the cookie lies flat on the prongs. Lightly tap the fork on the side of the bowl to help remove the excess chocolate coating. Place the cookie back on the baking sheet {that should still be lined with parchment paper}. Once the cookie sheet is full, place in the fridge to allow the cookies to set for approximately 30 minutes.
8. Enjoy! These cookies, while delicious on day 1, tend to taste better the following day, allowing the flavors to set over night makes them taste just like the Girl Scout variety.
*Although they initially need to be refrigerated in order to set, they don’t need to be stored there. However, we strongly suggest if you live in warmer climates to keep them in a cool place — pucks are meant for cooler weather after all!


