DIY: Hockey Rink Serving Plate

Sometimes a little hockey flair can go a long way. Birthday party, game viewing party, or a get together with friends, you can never have enough serving plates. Whether you make this as a gift for a friend or to use yourself, our Rink Serving Plate is a fairly easy, extremely affordable DIY.
Here we go…
Supplies
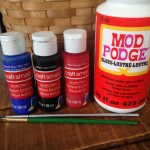 Mod Podge
Small head artist paintbrush
Medium head artist paintbrush
Acrylic paint, in red, blue and black
White ceramic plate or platter (We found our oversized square one at the Dollar Tree Store)
Ruler
Piece of scrap paper folded in half to use as a line guide
Dry erase marker
Bottle cap and soda can
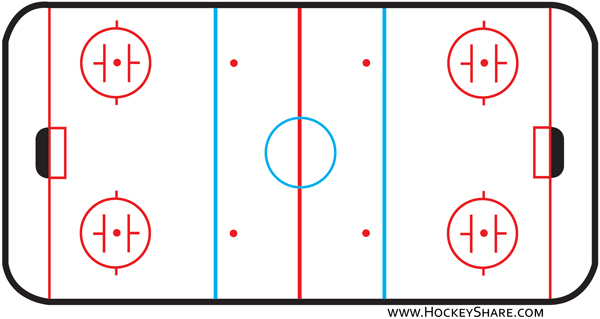
Ice rink diagram for reference
Directions
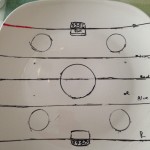
1. Take your dry erase marker and ruler, measure your plate/platter and draw a line down the center of the plate. Then continuing the measurements and following the diagram, mark the rest of your lines. Chances are good that your plate will have some curvature to it, if that’s the case, after marking each end of your line with the ruler, use the scrap paper to draw your line since it has flexibility.
 2.Continuing with your dry erase marker, while referencing the rink diagram, trace around the bottle cap for your face off circles. Then using the ruler or scrap paper, sketch in your hash marks.
3. Next, use the bottom of your circle to trace center ice, still using the dry erase marker.
4. Draw in your goal on both ends. We chose not to use the trapezoid, but certainly pop that in if you’d like.
5. Dip the butt end of your paintbrush into the red paint and slowly start tracing over your red lines. Then your face off circles and your hash marks. Essentially all the parts of the ice that need to be red, including the points. The dry erase marker should rub off as you go over it with paint.
6. Wipe the end of your brush clean and do the same thing with the areas of the ice that need to be blue.
7. Using black paint, and the end of the brush, go over your net and goal posts. We made little “x” marks for our netting to add a little dynamic.
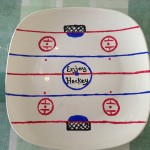
8. Leave center ice blank or paint in a saying, your team name, Team “Last Name” would be great also if you want to make sure you get your plate back after a big party. We enjoy food and we enjoy hockey so that’s what we painted in there using the butt end of the paint brush.
 9. Allow the plate to dry. Acrylic usually dries fairly quickly, so after 15-20 minutes using a piece of tissue gently wipe away any leftover dry erase marks.
10. Make sure the paint is dry, then using the medium head brush, evenly coat the surface with mod podge. Allow it to dry and add a second coat.
11. Enjoy your new serving plate! **HAND WASH ONLY**, we can’t stress this point enough!