
DIY: Beaded Safety Pin Team Bracelet

It’s been awhile since we threw a DIY your way and our Beaded Safety Pin Team Bracelet is a fun project that can be easily altered to match the color scheme of whatever team you root for. It’s also a project that is kid (5 and up with adult supervision) friendly and can be worked on while watching a game on TV. We decided to represent Team Pink and use pink metallic beads, but imagine how great a Team (USA, Canada, Insert country here) or Olympic Rings color scheme would look — we’re betting pretty awesome!
Do we have you hooked yet? What are you waiting for, let’s go!
You’ll need:
Glass beads in team of choice colors
Box of safety pins
1 package 1mm thin stringing elastic
Directions:
1. Measure two pieces of elastic around your wrist, leaving approximately an inch excess for tying purposes. Triple knot 1 end of each of the two pieces, place your knot about 1/2 inch from the end, so you have a small tail of elastic, you’ll need this for securing the two ends of the bracelet to each other. You’ll knot the other opposing end after you’ve strung them. Put aside.
2. Start beading your safety pins, leaving enough space at the top of the pin to secure it back together. It’s much easier to bead the majority of the safety pins first before stringing them. Wrists sizes vary, so you may use more or less – but we used around 55 safety pins.
3. Once you’ve beaded your pins, it’s time to string them. You’ll need to alternate the pins, first string pin string through the top hole of the enclosure, next pin through the bottom loop – alternating so you’ll be making a pattern with the pins. We found the easiest method being to string all of the pins to one piece of elastic and then begin the same process through the second piece of elastic.
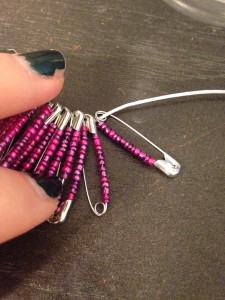
*Stringing tip (see photo below) – We struggled a bit with trying to thread the elastic through the top hole on the pin, but if you pop it open, hold the beads with your thumb and pull the elastic into the hole, then re-secure, it’s much easier. For those of you that need a comparison, the motion is similar to flossing your teeth.
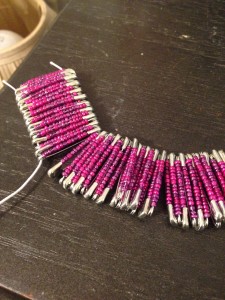
4. Once you’ve looped your pins onto both pieces of elastic, be sure to wrap it around your wrist, checking to see if you need more or less pins to complete the bracelet. Obviously, add more or remove some until the bracelet fits nicely on your wrist.
5. Next you’ll need to triple knot the ends of the bracelet to secure it. Similar to step one, you should have roughly 1/4 – 1/2 inch tail of elastic.
6. With the beads face down, grab your strings, tie the two top ends together, then the two bottom ends together to secure.
7. Turn your bracelet inside out, so the beads are on the inside. This is an easier method to make sure your knots are pulled tightly together, you can also trim the excess elastic.
8. Flip your bracelet so the beads are facing outward and you’re ready to wear!
-
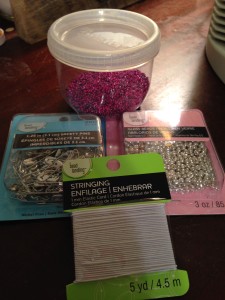
- Supplies
-
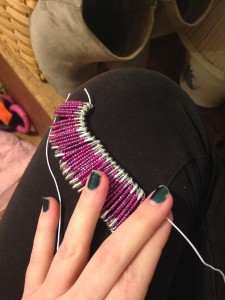
- String one side first
-
- Then the other
-
- Alternate your pins top, bottom
-
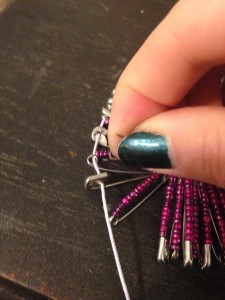
- See stringing *tip
-
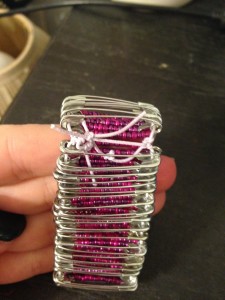
- Flip inside out to secure
-
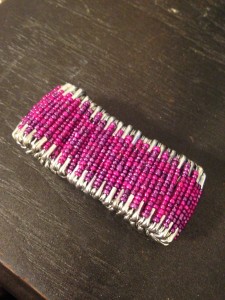
- Safety Pin Bracelet
-
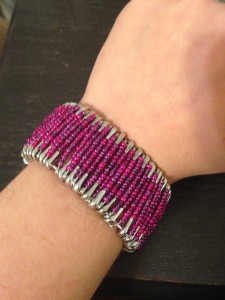
- Ready to wear!


[…] collection and one of the most comfortable pairs of shoes I’ve ever worn – so kudos. Pink Safety Pin Bracelet, our own Pink Puck DIY project, cost under […]
[…] Beaded Safety Pin Team Bracelet […]
[…] Beaded Safety Pin Team Bracelet […]