
DIY: “Resurfaced” Hockey T-Shirts

Almost any hockey fan I know has a hankering for jerseys, memorabilia and t-shirts… oh the t-shirts. I think for some of us (myself included) hockey t-shirts are an addiction of sorts. Whether you’re road tripping to a game, shopping at the mall or even sorting the piles at the local thrift store for something vintage; if you see a hockey t-shirt you like, you buy it. While the purchase(s) in question may have been a good idea at the time, chances are you might be sick of the same run of the mill shirt that has now become #1 on the IR in the back of your closet.
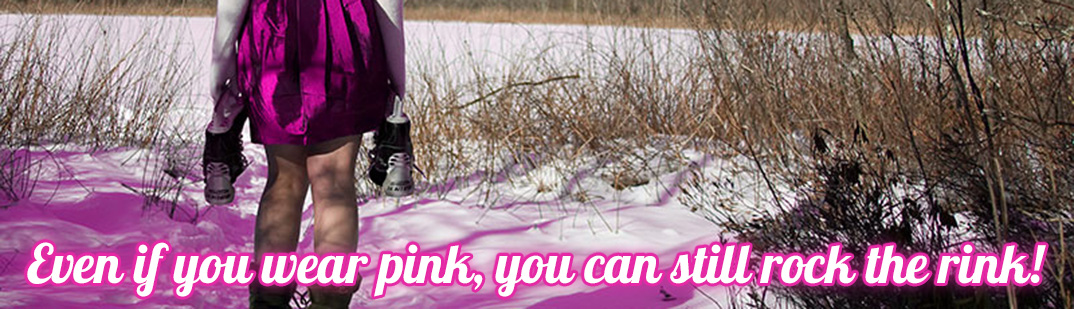
With “up cycling” ideas just one Google search away, I decided to hit the cutting board to resurface some of my old shirts and make them off-season ready. So grab your scissors (sadly, skate blades won’t do), and a t-shirt and prepare for the endless hockey free days ahead. You’ll be thinking about the rink, while rockin’ your resurfaced hockey shirt all over the stadium, field or pool and reminding everyone that we play, support and love the superior sport even in the off-season.
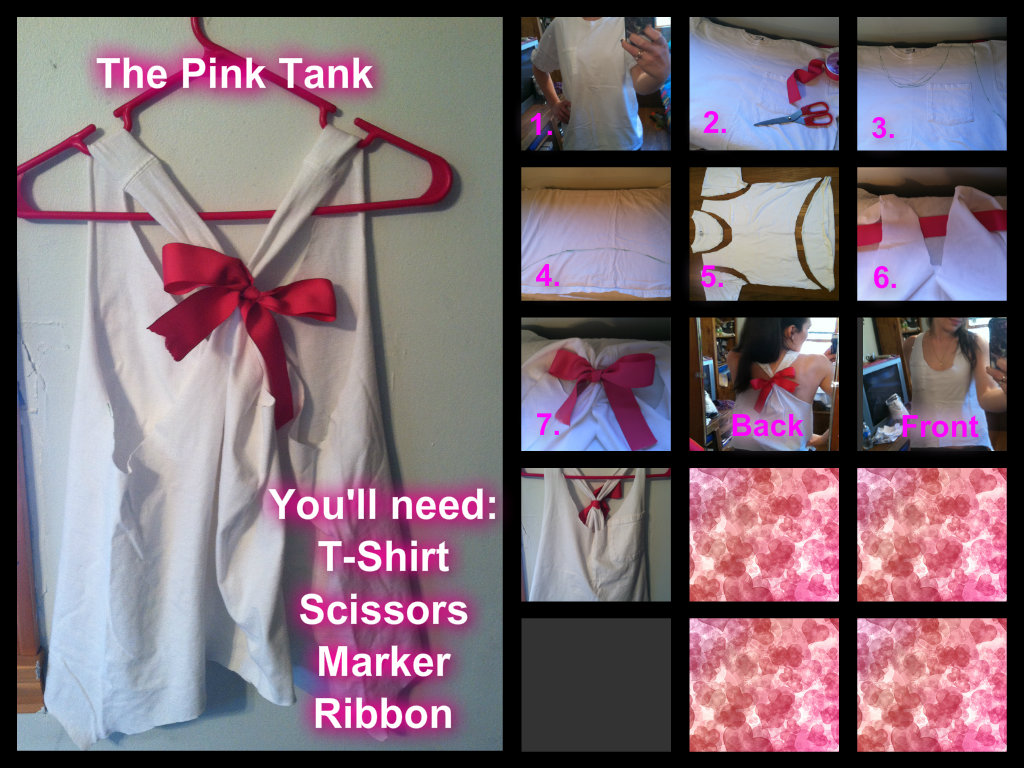
The Pink Tank: We all have that one t-shirt, you know the one we simply can’t part with. It has sentimental value, but no matter how strong the sentiment- you wouldn’t be caught dead wearing it in public. This boring white t-shirt happens to hold strong value in the hockey emotions department for me. It was worn to the rink on the same day that I scored my first goal in women’s league. Of note, it hasn’t seen daylight since. Now i’ll have the memory and a cute tank to take me through the depressing hockey free months.
1. Try on your t-shirt to determine roughly how much length you’d like to cut off.
2. Lay your shirt on a flat surface.
3. With your marker, draw a scoop around the neck and the sleeves of the t-shirt.
*Note: You can always go back and cut more fabric off for a lower neckline, but it’s awfully hard to put the fabric back after you’ve cut it off! If you’re worried, make a small scoop, try the shirt on and go back to make a deeper cut if needed.
4. Maker an “arch” or “rainbow” shape at the base of the t-shirt, based on the amount of length you wanted to cut off.
5. Follow your lines and cut the shirt,
6. Flip the tank over and run ribbon through the back shoulder straps. Ribbon length dependent on how large or small you’d like the bow.
7. Tie a bow and she’s ready to go!
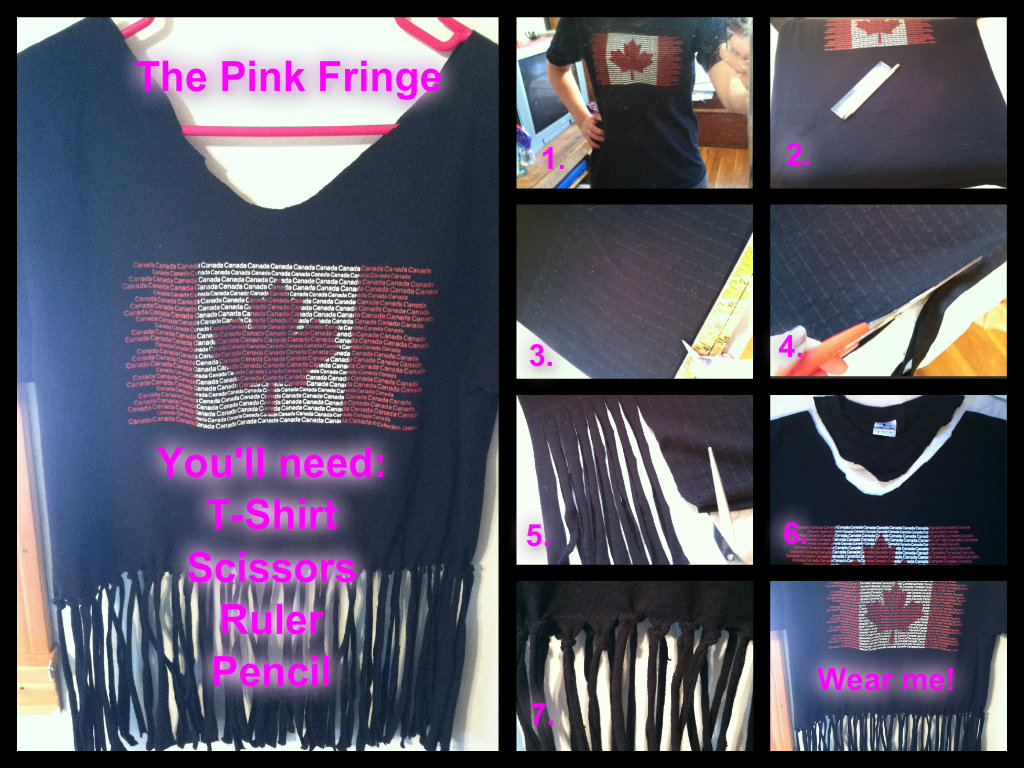
The Pink Fringe: For anyone that’s traveled, you’ve probably picked up a t-shirt at your destination. Well, traveling to hockey games on the regular, mixed with an undying love for Canada has given me (I won’t admit to how many) t-shirts. Each one with minor variations on the Canadian flag and the term “eh”. But after this DIY, my Canada t-shirt is bringing fringe back for the off-season!
1. This style works best with a slightly fitted t-shirt. Try on your shirt and decide where you’d like the fringe to start and mark it (I chose 14 inches, but any amount can work).
2. Lay your shirt on a flat surface, grab your ruler and pencil (if you have one, a white colored pencil on dark fabrics works best).
3. With a ruler measure the amount of length that you’ve picked from the bottom (right above the hem line) to middle of the shirt. Now mark the length 3 times, once on the left, middle and right of your shirt- now draw a horizontal line through the points. This will ensure that your fringe is even! Now mark lines every centimeter across your shirt from the horizontal line to the top of the hem.
4. Now you’ll cut the hem off the bottom of your shirt (Don’t do this prior to marking your fringe lines- it’ll cause the shirt to curl at the bottom and you don’t want that quite yet).
5. Get your fringe on! Start cutting your fringe marks, obviously stopping at the horizontal line. It can be tricky but try to keep it as even as possible.
6. Cut a “V” in the neckline of the shirt.
7. Creators choice here, after step 5- you can be done. However, I chopped the neckline as seen in 6. Then I took the added step of knotting the top of each fringe strand at the horizontal line for a more complete look and I’ll admit that I’m happy I did.
The Pink Fringe is ready to wear! If you aren’t overly keen on showing your stomach, the shirt will look cute with a tank top underneath as well.
*Note: If you’re feeling really brave, you could also cut the sleeves as seen above in The Pink Tank for a fringe tank look!
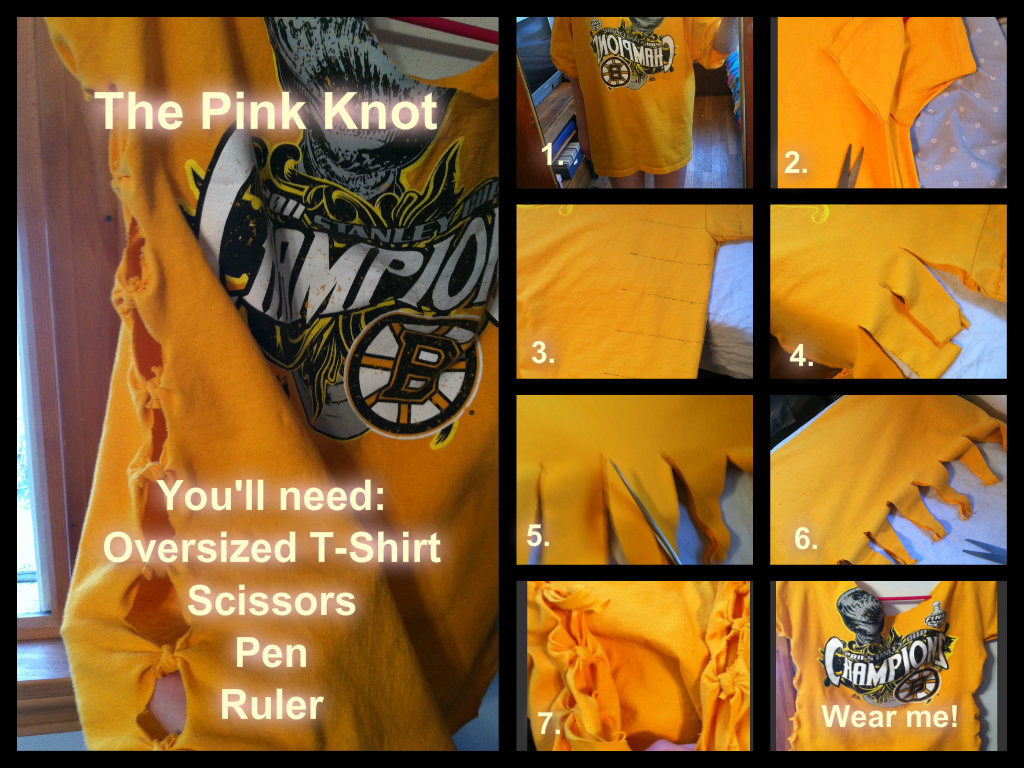
The Pink Knot: Ever the bargain hunter, this Boston Bruins Stanley Cup t-shirt was $1, yes $1 (I wonder why) at a rummage sale. Yes, the men’s XXL was just my size and obviously, I had to have it. I think we have all been there, we see something so cool that we have to have it and then you put it on at home. In retrospect, the t-shirt was not as great as anticipated, it’s larger than half the dresses I own. I found myself hoping that the Bruins would win another cup, solely so I could rent out my shirt as a tent on the street corner downtown for the parade and maybe get my $1 back. Well, the Kings won the cup and I decided to change the fate of this Bruins t-shirt
1. Try on your t-shirt and decide how much you’d like it to be taken in on the sides, remember this number and add 1.5. I needed 4 inches taken in, so my final number was 5.5. If you’re working with a shirt that you don’t want taken in, you’ll just use 1-1.5 inches.
2. Grab your scissors and slice the shirt at it’s seams from the bottom, all the way under the sleeve.
3. Fold your shirt lengthwise in half. You’ll now make 2 inch marks/strips down the side of the shirt with a pen. Each mark will be “your number” deep… so 1-1.5 inches if you don’t want the shirt to be taken in, or 1.5+inches you’d like taken in.
Example: For my shirt, every 2 inches, I made a 5.5 inch deep mark.
4. Cut the marks into strips.
5. Now you’ll need to cut your strips into “triangles”. The easiest method is to cut each strip diagonally in half.
6. Your shirt should now look similar to photo 6.
7. Unfold your shirt and tie, then knot (make sure you pull them TIGHT) each triangle together down the side of the shirt. Here you can decide to leave the ties on the knots as see on the left of picture 7 or cut the strings of each knot as seen to the right of picture 7. Don’t be afraid of pulling and stretching out the knots a bit, it’s encouraged!
8. Cut a “v” or a scoop (see step 6 in The Pink Fringe if you’re unsure) along the top of your t-shirt.
Voila, the tent is ready to wear in a public forum!
*Note: If you aren’t a fan of showing skin, this shirt looks great with a tank top or even a long sleeve during the colder months. Make sure whatever shirt you wear underneath is another color from your teams scheme.


[…] DIY Hockey T’s […]